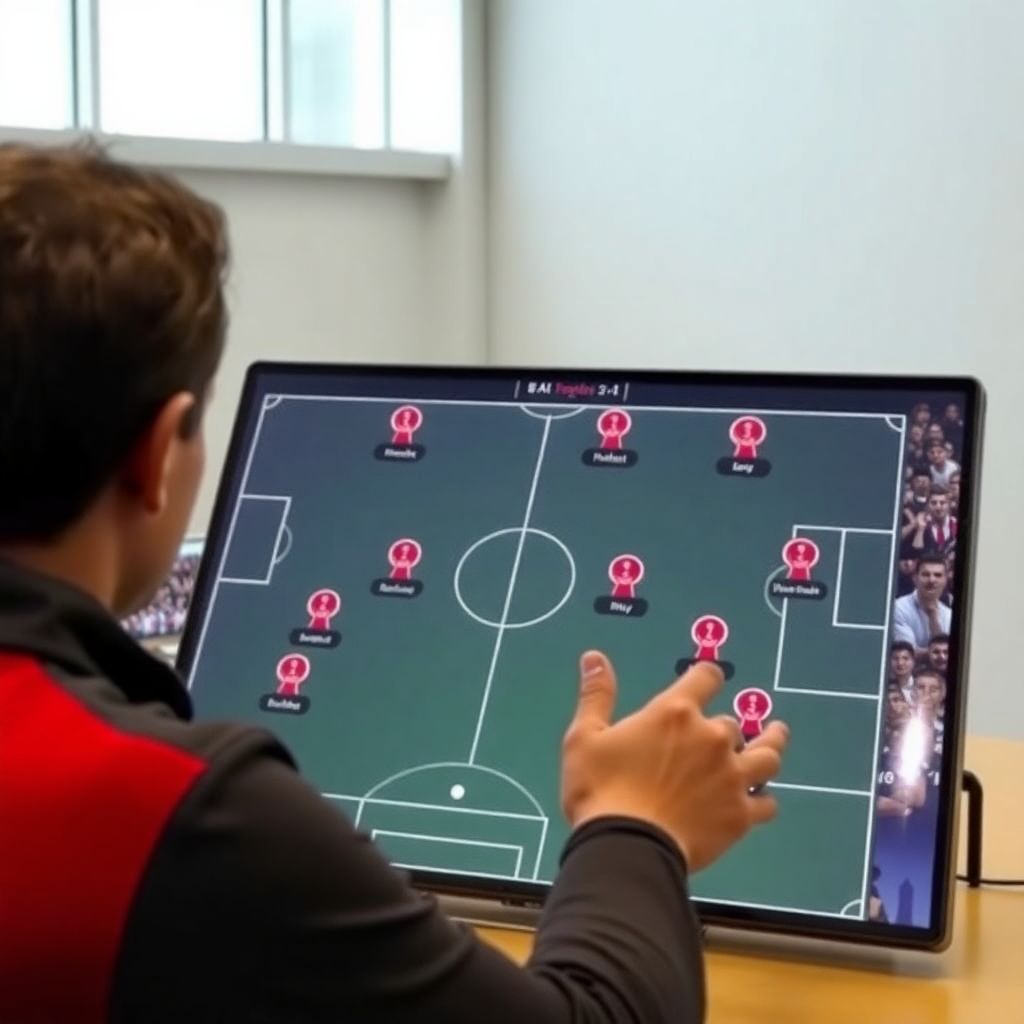
A tactical board helps you visualise Galatasaray’s preferred 4‑2‑3‑1 (or similar) shape, define roles, and simulate match scenarios: building from the back, breaking low blocks, and defending transitions. Using a digital or magnetic board, you freeze key moments, move pieces, and create repeatable patterns your players can recognise and execute.
Essentials at a Glance
- A tactical board for football coaches turns formations into repeatable automatisms, not just pretty shapes.
- Galatasaray’s common base is a 4‑2‑3‑1 morphing into a 2‑3‑5 or 3‑2‑5 in possession and 4‑4‑2 out of possession.
- Roles are defined in zones: build-up line, midfield line, final-third line, plus roaming pockets between the lines.
- Use football formation analysis software Galatasaray Fenerbahce Besiktas to compare shapes and track heatmaps across matches.
- Set-pieces are designed on the same board to keep language, zones, and reference points consistent.
- Tactical flexibility is coached as a sequence of triggers, not as random changes: press, protect, or re-balance.
Formation Blueprint: Anatomy of the Preferred Shape
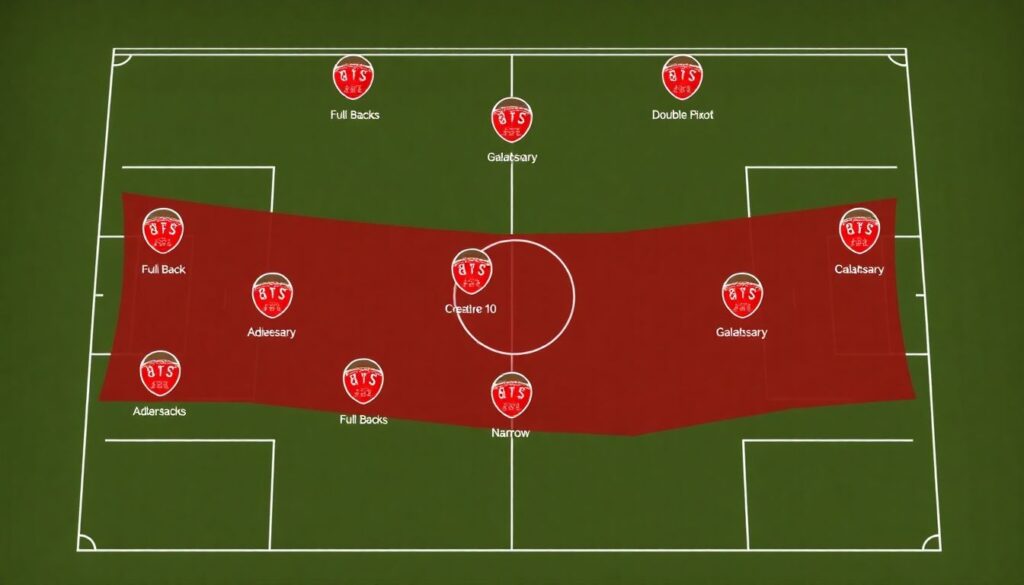
For Galatasaray, the most frequent reference structure is a 4‑2‑3‑1. On a tactical board you see two clear centre-backs, aggressive full-backs, a double pivot, a creative number 10, and wide forwards that attack half-spaces rather than hugging the touchline constantly.
In possession, this 4‑2‑3‑1 often becomes a 2‑3‑5. One full-back steps inside next to the double pivot to form a line of three behind the ball, while the far-side full-back joins the attacking line. The wingers narrow into inside channels, allowing the 10 to roam between lines.
Out of possession the shape collapses into a compact 4‑4‑2 or 4‑4‑1‑1. The 10 steps up to press alongside the striker, while wingers drop to form a flat or slightly staggered midfield four. Lines stay tight vertically to deny central progression.
On a digital tactics board for soccer analysis you can freeze three main "layers": first line (CBs + pivot), second line (pivot partner + 10 + wingers), and third line (striker + far-side winger attacking the box. These layers explain connections and distances more clearly than simple position labels.
| Aspect | 4‑2‑3‑1 (Galatasaray base) | 4‑3‑3 Alternative | 3‑4‑3 Alternative |
|---|---|---|---|
| Central stability | Double pivot offers protection and clear rest-defence | Single pivot can be overloaded if interiors jump too high | Three centre-backs stabilise but wing-backs must win duels |
| Wing usage | Wingers in half-spaces, full-backs provide width | One winger tends to stay wide, asymmetry common | Wing-backs own the flanks, front three narrower |
| Pressing reference | 4‑4‑2 press with 10 stepping up | Front three can press high with clear lanes | Flexible: 5‑2‑3 high or 5‑4‑1 mid/low |
| Fit vs. Super Lig rivals | Balances control vs. Fenerbahçe/Beşiktaş and mid-table blocks | More aggressive against weaker sides, riskier vs. elite build-up | Useful when protecting lead or facing strong wide threats |
- Can you clearly show, on the board, how the base 4‑2‑3‑1 morphs in each phase?
- Are distances between lines realistic when you freeze the team at the halfway-line?
- Have you compared your base shape with at least one alternative in specific match-ups?
Individual Roles and Occupied Zones
On a tactical board, every Galatasaray player receives a primary zone plus two secondary pockets. This prevents confusion when the 4‑2‑3‑1 stretches or compresses. Use magnets or digital icons to show "resting" positions and arrows to show dynamic movements.
| Line | Role | Primary Zone | Main Responsibilities |
|---|---|---|---|
| Back line | Centre-backs | Central corridor, own half | Initiate build-up, cover depth behind full-backs, win aerial duels, organise rest-defence. |
| Back line | Full-backs | Wide channels, both halves | Provide width in attack, support winger, recover quickly to back four, time underlaps/overlaps. |
| Midfield | Holding midfielder | Central third, in front of CBs | Offer passing outlet, screen opposition 10, balance when others advance. |
| Midfield | Box-to-box pivot | Half-spaces, both directions | Arrive in the box late, counter-press, support full-back when winger narrows inside. |
| Attacking band | Number 10 | Between lines, central/half-spaces | Receive on the half-turn, link with striker, create overloads with winger and full-back. |
| Attacking band | Wingers | Wide and inner channels | Alternate staying wide vs. attacking half-space, press full-back, track opposition runner. |
| Front line | Striker | Central lane, high line | Occupy centre-backs, pin line, attack crosses, set lay-offs for 10 and wingers. |
- Back four: identify which full-back in Galatasaray is more comfortable inverting and mark that as the default build-up pattern.
- Double pivot: one stays, one goes; draw arrows to show their opposite movements when the ball switches flank.
- Front four: specify exactly which zones the 10 may enter when the winger drives inside (avoid double occupation).
- Does every player on your board have one primary and two secondary zones clearly marked?
- Are movement arrows limited to essential patterns, not cluttered all over the pitch?
- Can substitutes immediately see their expected zones when you move magnets or icons?
Constructive Phases: Progression Routes and Patterns
Progression phases describe how Galatasaray move from the first line to shots. On a soccer coaching app for creating formations and tactics, save 3-5 standard patterns: vs. low block, vs. mid-block, and vs. high press. Each pattern has clear start and end frames.
-
Building vs. mid-block (home vs. Anadolu side)
CB plays into holding pivot, who bounces wide to inverting full-back. The near winger narrows inside, 10 drops to support, box-to-box midfielder makes a third-man run beyond the press. You freeze the board at each pass to show spacing. -
Breaking low block (derby where Fenerbahçe sit deep)
Use a 2‑3‑5 structure: full-backs high, wingers in half-spaces, 10 floating. Show rotations: winger drops to receive, full-back overlaps, 10 attacks box. Diagram crossing lanes and cut-back zones, not just "we cross". -
Playing through high press (away in Europe)
Draw a lopsided 3‑2 base: one full-back tucks in, other stays slightly deeper as "escape" option. Striker drags one CB away, 10 offers diagonal outlet. This pattern prepares your team to avoid panicked long balls. -
Switching side quickly after regain
On regain in the left half-space, pivot immediately plays to far full-back. Near winger sprints inside to pin, far winger stays wide. The board shows pre-defined "switch lanes" so players know first and second options without thinking. -
Late-game chasing goal scenario
Push box-to-box pivot into the last line to form quasi 2‑2‑6. Mark zones for second balls around the box. Clarify who covers counter if Galatasaray lose the first duel after a cross.
- Have you saved distinct board frames for build-up, consolidation, and final-third in your software?
- Can players identify at least two rehearsed progressions against low and mid-blocks?
- Do your patterns include clear safety exits (back or inside passes) for when the main route is blocked?
Defensive Organisation: Pressing, Compactness and Cover
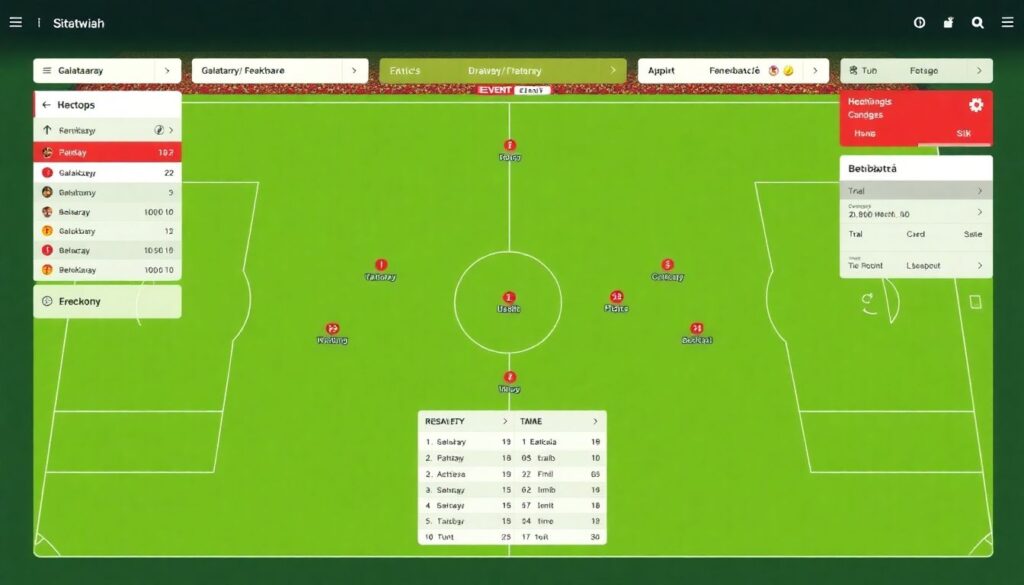
Defensively, Galatasaray oscillate between organised mid-blocks and intense pressing phases, particularly in home games. A tactical board for football coaches is ideal for plotting starting positions, triggers to jump, and cover zones when the first press is bypassed.
Use the board to show three common structures: 4‑4‑2 mid-block, 4‑4‑1‑1 with a deeper 10, and emergency 5‑4‑1 when protecting a narrow lead. Heatmap snapshots from best digital tactics board for soccer analysis tools help players understand realistic compactness, not idealised chalkboard distances.
-
Pressing strengths
- Wide players can funnel opponents inside towards the double pivot.
- 10 and striker can press in tandem, curving runs to force play one way.
- Full-backs step out aggressively knowing a pivot can drop into the back line.
-
Pressing limitations
- If the 10 is late to press, shape can split into 4‑2‑4 with huge gaps.
- High full-backs leave space behind if wingers do not track their runner.
- Long diagonals behind the last line can punish an overly high block.
- Can you point to exact pressing triggers on the board (bad touch, back pass, sideline trap) instead of saying "press high"?
- Do you have a clearly drawn fallback block for the moment the press is beaten?
- Are cover and balance players (usually CB + pivot) visibly marked as "never both jump"?
Set-Piece Integration: Offensive and Defensive Routines
Set-pieces should mirror your open-play structure. On your board, corners and free-kicks for Galatasaray reuse the same zones and reference points as the 4‑2‑3‑1. However, many myths and recurring mistakes weaken this link and make routines chaotic.
-
Myth: "More players in the box = more goals"
Overloading the box without second-ball structure leaves you open to counters. Use the board to park at least two players around the edge and one deeper rest-defence cover. -
Myth: "Zonal or man-marking is a binary choice"
In reality, Galatasaray, Fenerbahçe and Beşiktaş all blend zonal lines with 2-3 man-markers for top threats. Show coloured magnets for zone keepers and different ones for markers so roles are unambiguous. -
Mistake: Reusing the same corner path every match
Opponents quickly adapt. Draw two short routines and two direct routines on your tactical board, with clear blocking runs and screens for aerial targets. -
Mistake: Ignoring goalkeeper starting positions
Defensive corners often forget the keeper’s role. Freeze frames where the keeper commands six-yard space vs. where defenders must attack the ball first. -
Mistake: Throw-ins treated as "small restarts"
In Super Lig, throw-ins near halfway are frequent counter opportunities. Sketch 2-3 pre-designed combinations to exit pressure safely instead of random throws down the line.
- Have you drawn at least two attacking and two defensive corner schemes with names your players can memorise?
- Are rest-defence positions and second-ball zones visible for every offensive set-piece?
- Do you rehearse throw-ins and free-kicks on the board, not only on the pitch?
Tactical Flexibility: In-Game Triggers and Substitution Logic
Tactical flexibility is planned, not improvised. Before matches, you use a board to pre-define structural changes for common scenarios: chasing a goal, protecting a lead, or handling a red card. This avoids emotional, disconnected substitutions on match day.
-
Scenario: Chasing a goal on 70'
Trigger: Still losing after 65' with low shot quality.
Board adjustment: Move box-to-box pivot to a higher line, change one winger to a second striker, show full-backs even higher, build 2‑2‑6. Sub on a fresh winger to attack far-post zone. -
Scenario: Protecting a 1‑0 lead vs. Beşiktaş
Trigger: Opponent introduces second striker.
Board adjustment: Pull 10 back into a third midfield role (4‑1‑4‑1), or substitute a winger for an extra midfielder and draw a more compact block, with clear counter outlets marked. -
Scenario: Playing with ten men
Trigger: Red card to a full-back.
Board adjustment: Re-draw into 4‑4‑1 by dropping a winger to full-back and sacrificing the 10, or into a 5‑3‑1 depending on game state. Show exactly who shifts where. -
Scenario: Fresh energy vs. high-intensity Fenerbahçe
Trigger: Opponent press still strong after 60'.
Board adjustment: Change to a 4‑3‑3 with an extra midfielder to escape press, marking rotations between interiors and wingers.
If you use football formation analysis software Galatasaray Fenerbahce Besiktas data, you can replay recent derbies and overlay your preferred changes on top of heatmaps. This way, subs visually understand why their introduction shifts the team’s shape.
- Do you have at least two pre-planned structural changes drawn for "need goal" and "protect lead" scenarios?
- Are substitution roles defined by zones and tasks, not only shirt numbers or "position names"?
- Have you simulated red-card scenarios with magnets to avoid confusion during real matches?
End-of-Session Self-Check for Coaches
- Is your main tactical board (digital or physical) updated to reflect the current first XI and realistic distances?
- Have you stored key patterns and set-piece routines inside your soccer coaching app for creating formations and tactics?
- Do players see the same shapes on the pitch that they see on the board and on video?
- If you buy magnetic tactical board for soccer team use, is it large and clear enough to see from dressing-room distance?
- Are all derby-specific adjustments vs. Galatasaray, Fenerbahçe, and Beşiktaş drawn and named before match day?
Tactical Clarifications and Recurring Uncertainties
Is a digital or magnetic tactical board better for Turkish club environments?
Use a mix. A buy magnetic tactical board for soccer team is perfect for quick dressing-room talks and on-pitch explanations. A digital solution is better for saving patterns, using video overlays, and sharing clips remotely with players between matches and training sessions.
How often should I change Galatasaray’s base formation during a season?
Keep one stable reference shape for most of the season and adjust using roles and zones, not constant system changes. Shift to alternatives like 4‑3‑3 or 3‑4‑3 only when specific opponents or injuries demand it and explain changes clearly on the board.
Can I use the same tactical principles for Fenerbahçe and Beşiktaş?
The core ideas-zones, connections, rest-defence-are shared, but each club’s squad profile is different. Adapt full-back heights, pivot responsibilities, and winger positioning to the specific players you coach while keeping the visual language on the board consistent.
How do I avoid overloading players with tactical information?
Limit each session to one or two board-based messages: a specific build-up pattern, a pressing trigger, or a set-piece variant. Use clear colours, minimal arrows, and repeat the same terms across video, training, and match talks for better retention.
What is the role of video when I already use a tactical board?
Video shows reality; the board simplifies and generalises. First, show a short clip, then freeze a still image and recreate it on the board. This link helps players understand how your idealised shapes appear in the chaos of a real match.
Which software helps most with formation analysis in the Turkish context?
Look for best digital tactics board for soccer analysis tools that integrate event data, heatmaps, and drawing tools. Ensure they can tag Galatasaray, Fenerbahçe, and Beşiktaş games easily, export images for presentations, and sync with mobile devices players already use.
How many rehearsed attacking patterns do I actually need?
You do not need dozens. Focus on a small, repeatable menu: 2-3 vs. mid-blocks, 2 vs. low blocks, 1-2 transition patterns. The goal is recognition, not complexity; players should identify and execute patterns under pressure without overthinking.